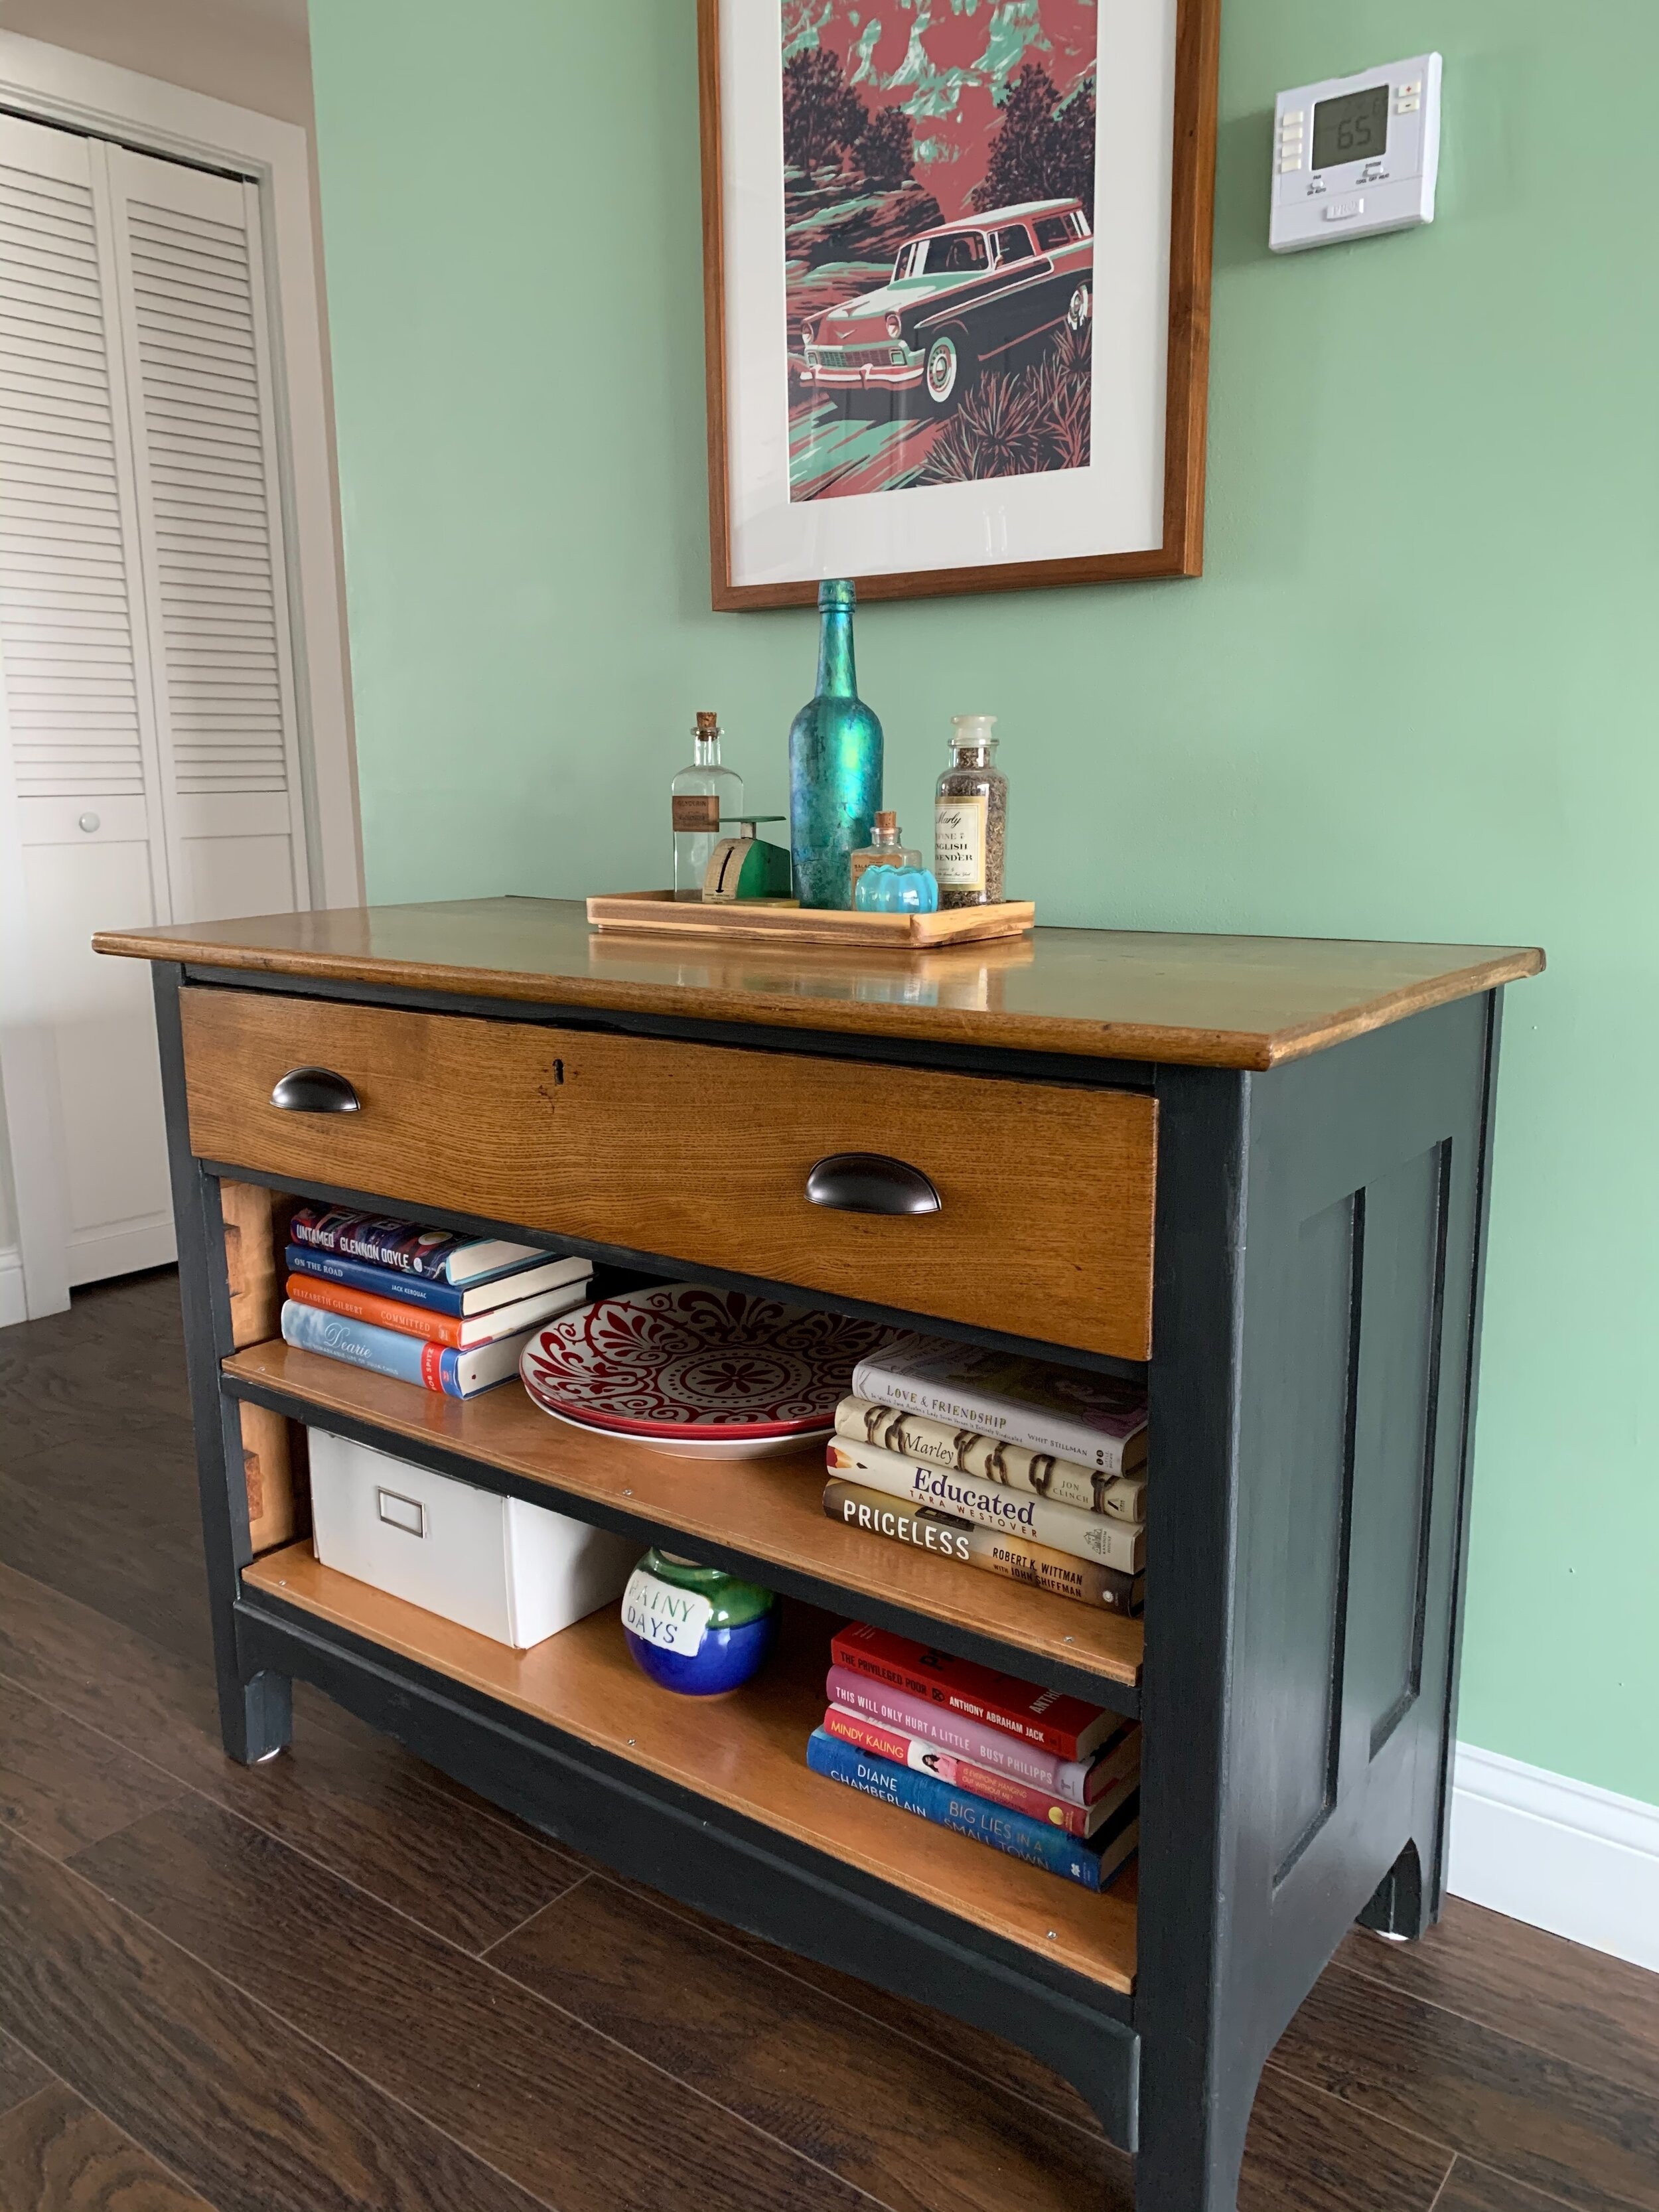
Repurposed Decor: A DIY Kitchen Island and Buffet
About three years ago, I inherited an antique bureau when my parents downsized. With storage lacking in my own home – especially in the kitchen – I opted for a project: upcycling the bureau into a unique kitchen island/buffet.
At the time, I lived in an old mill building, with high ceilings, original wood flooring, and tons of windows. I really love that aesthetic, but because the space was setup as an open floor plan from kitchen/dining to living room, there was limited wall space for cabinetry and countertops. The builder stuck with a small L-shaped design for the kitchen, which was okay for basic food prep, but lacking when entertaining. When I purchased the property as a first-time homeowner, funding a custom-built island just wasn’t in the cards. And so it remained for approximately 8 years: a small kitchen work area with lots of “legroom.”
So why revitalize a bureau into kitchen decor? It helped that the piece I inherited was on wheels, and close in height to my countertops. Despite its age, the bureau was well-maintained, with a top that had several coats of polyurethane. Not food safe – but also not likely to get stained from a quick spill. I like to be sustainable whenever possible in decorating, so this was a good solution.
When I told my Dad (who’s not only very handy, but also had the tools at home for the reconstruction aspects of this project) that I was thinking of upcycling the bureau, he wasn’t so sure about the idea. It took a little convincing, but considering the timing – and need to get rid of furniture before their move – he came around, and ultimately helped bring the redesign from vision to life.
This bureau was originally a three-drawer unit. To add open storage for cookware and other items, we removed the bottom two drawers. My Dad cut two shelves out of 1/2” thick oak plywood, measuring wide enough to sit level on the wood rails that previously served as drawer slides inside the bureau. Each shelf was then coated with clear polyurethane, and three holes were drilled evenly across, approximately 1/2” from the front end, to allow for screws to secure it in place.
The back of the bureau was originally unfinished, and a much darker color than the finished portion due to age. To avoid having the whole piece refinished, and to add some contrast, I opted to finish the sides and back in a charcoal-toned chalk paint. For those new to chalk paint, it’s an easy water-based alternative to traditional latex paint, which requires little-to-no prep work, and is less likely to produce drip marks or other imperfections because of its texture and matte finish. Since the bureau had finished sides, I gave it a quick, light sanding, to ensure a strong paint bond. I removed the top drawer and new shelves, used painter’s tape to protect the portions of the piece not being refinished, and got to work! Using a small roller and angled brush, the painting was finished in just two coats.
Most chalk paint brands suggest different wax options as a finish coat. With this piece living in a kitchen, where drips or spills were inevitable, I decided instead on a coat of clear polyurethane. The finished product had a little shine, but was still a good contrast to the bureau’s original wood-toned finish.
After a day of drying, I secured the two new shelves in place. Before reinstalling the original top drawer, I swapped out the pulls for a more modern “cup” style in a brushed black finish, which coordinated nicely with the charcoal paint. I also added a layer of cork lining inside, to freshen up the drawer, which would eventually hold utensils and spices.
And voila! For around $50, the finished island made a huge difference in my storage situation and the overall functionality of my kitchen. It also added more character to the space. Since finishing the project, I’ve moved to a new home, and the piece works great as a buffet in my dining area.
Thinking of taking on a project like this for your space? You could also add fixtures on the sides of the bureau for hanging utensils, pots and pans, and paper towels, or extend the top of the piece (by replacing it or adding a folding element) to create a breakfast bar. Let me know how it goes!


